How to create a WordPress Website for Free?
Hi, welcome to this blog post where you will learn how to create a complete WordPress website for free. You will learn the full process of getting a free custom domain name, and hosting for 1 year. It’s time to create your first website or to practice your WordPress website building and managing skills.
Without further ado, let’s learn the process step by step together.
Free Domain Name Registration:
First of all, we will need to have a domain name and to get a free domain, we are going to use Freenom.com which is providing us free domain for one year.
Visit the website and put targeted domain name and click on “Check Availability” button as shown in the image below.
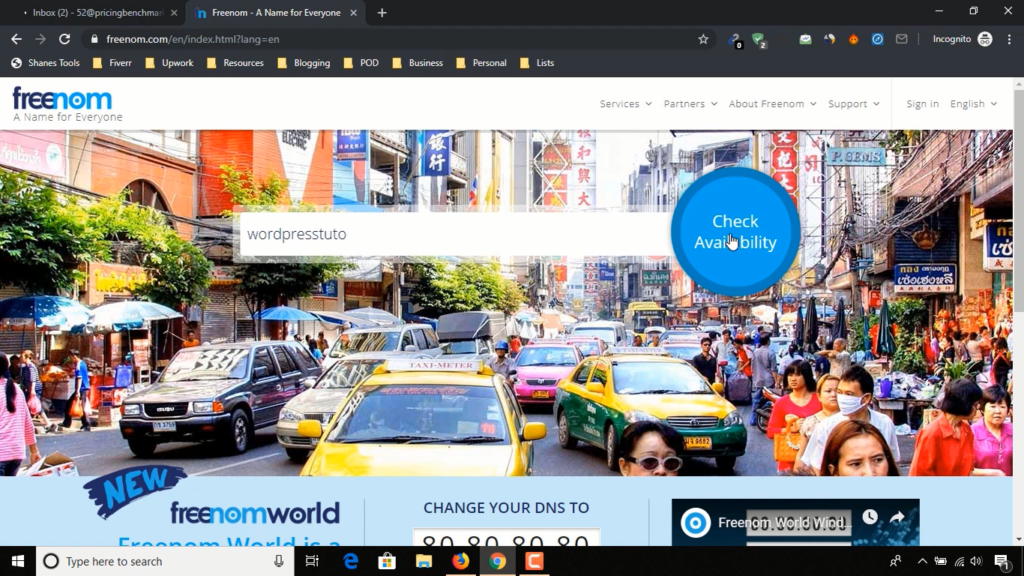
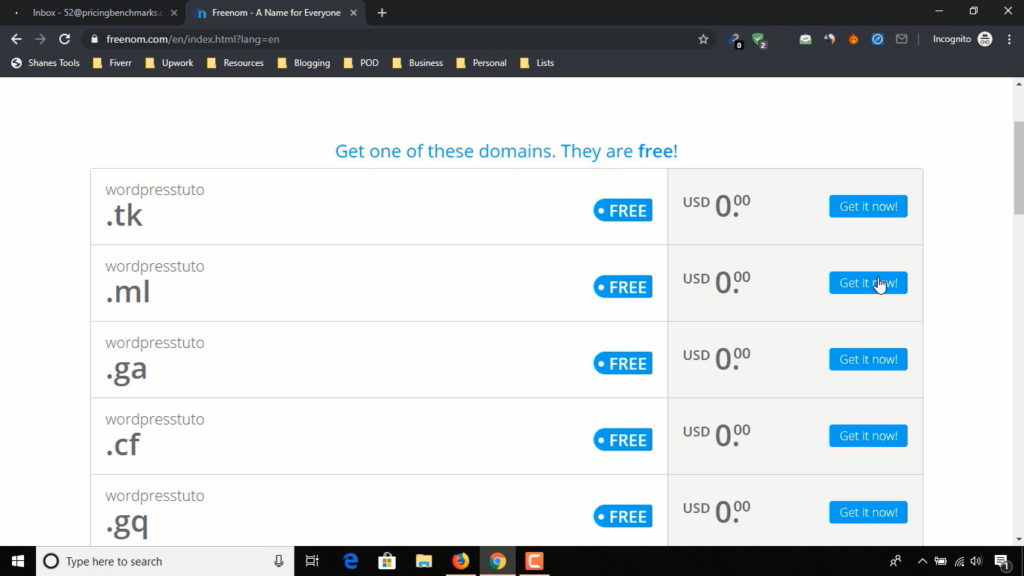
We will find the domain name with few extensions, choose any one of them as you prefer. I am choosing wordpresstuto.ml, to get the domain, click on “Get it now” button.
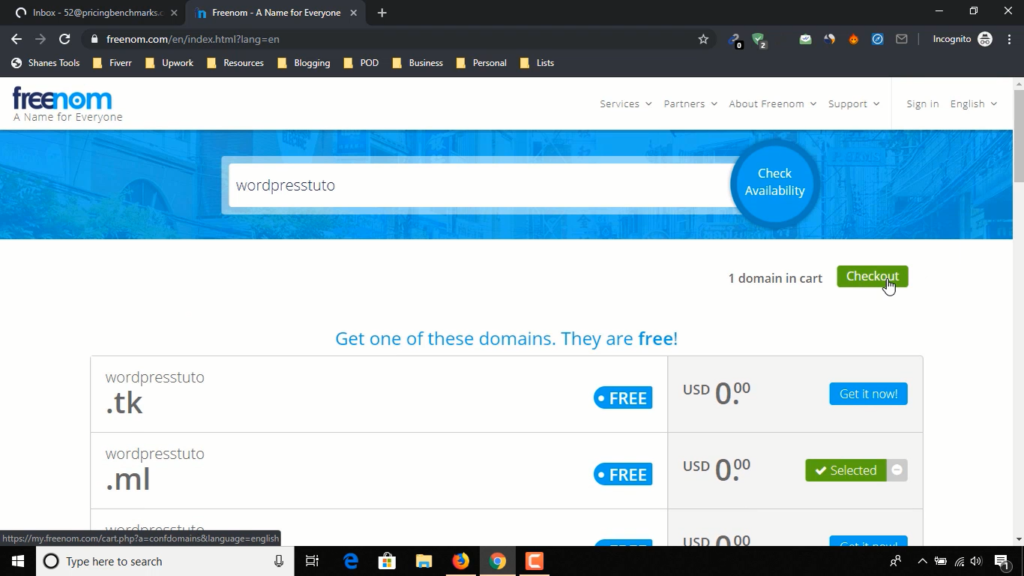
After selecting the domain, click on “Checkout” to proceed to next step.
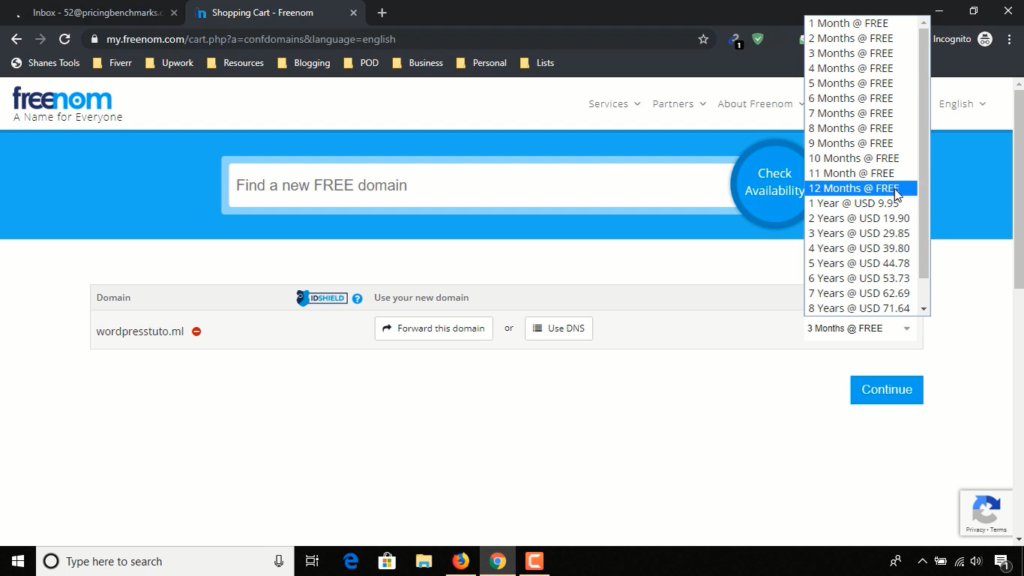
You will be directed to a page shown in the image below, select the time to 12 Months @Free option and click on “Continue” button below.
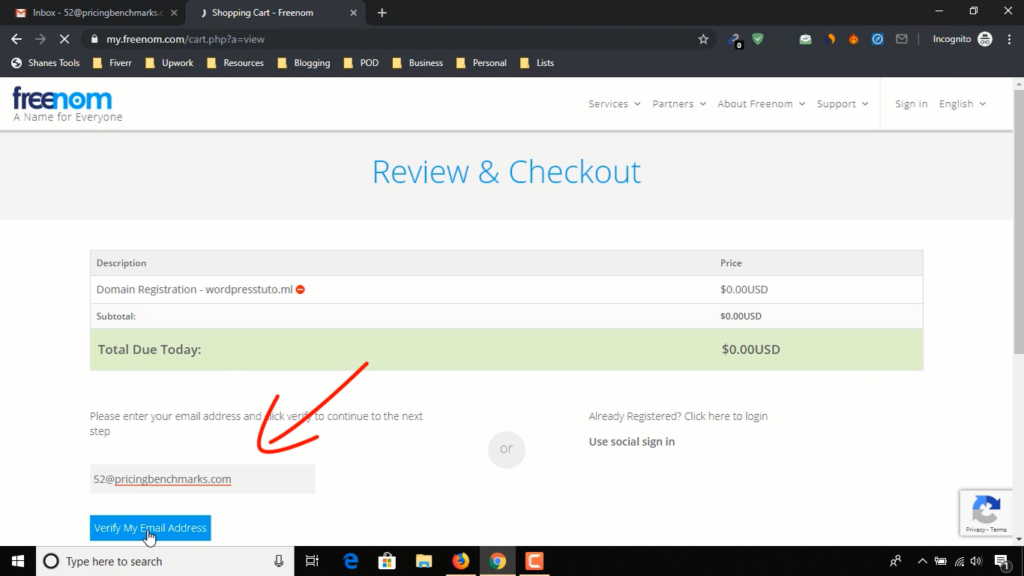
You will be directed to “Review & Checkout” page, put your email address in the place pointed by red arrow sign in the image below and click on “Verify My Email address” to start the domain name registration process.
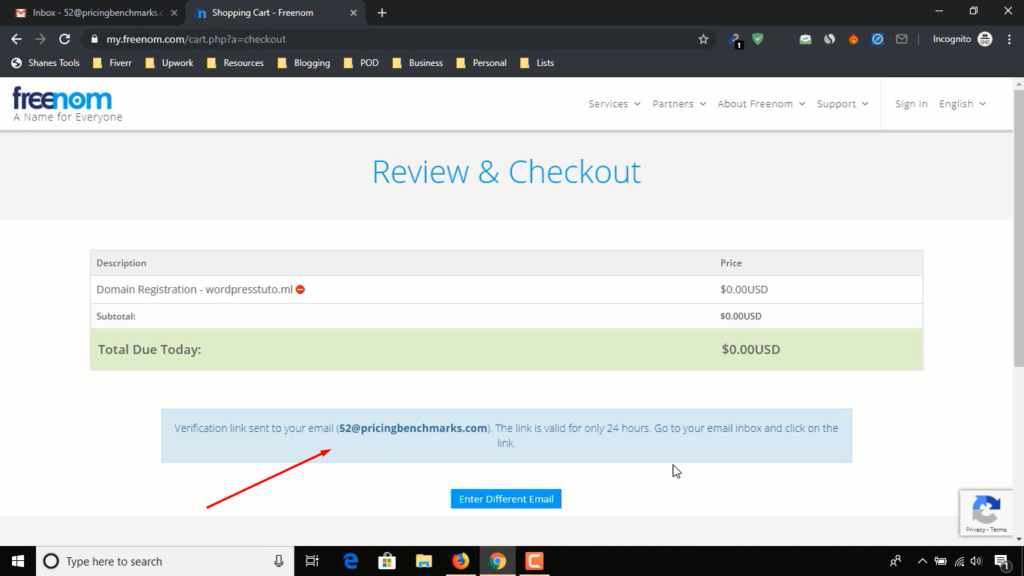
They will send you an email with verification link, please check out the note pointed with arrow sign.
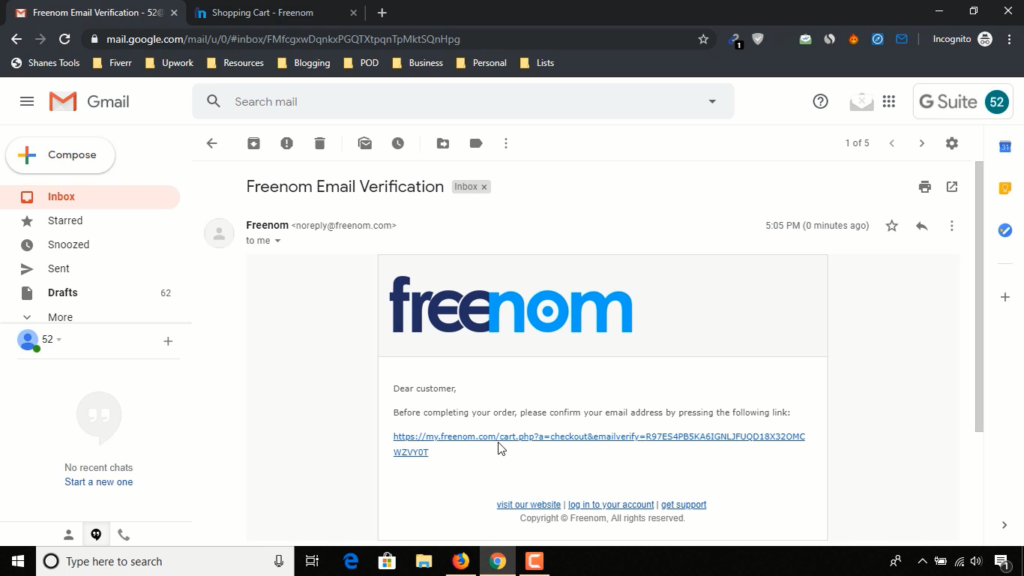
Click on the link to verify your email.
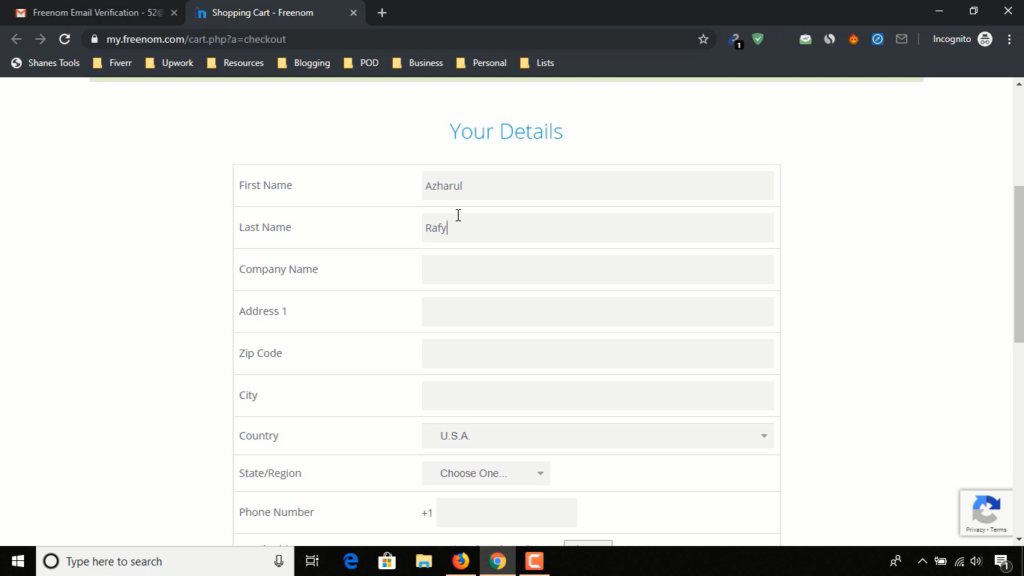
They will redirect you to the “Review & Checkout” page again, where you will find a form to put “Your Details”, fill it up. Check mark the field of “I have read and agree to the Terms & Conditions” and click on “Complete Order” button you will find on the bottom of the page.
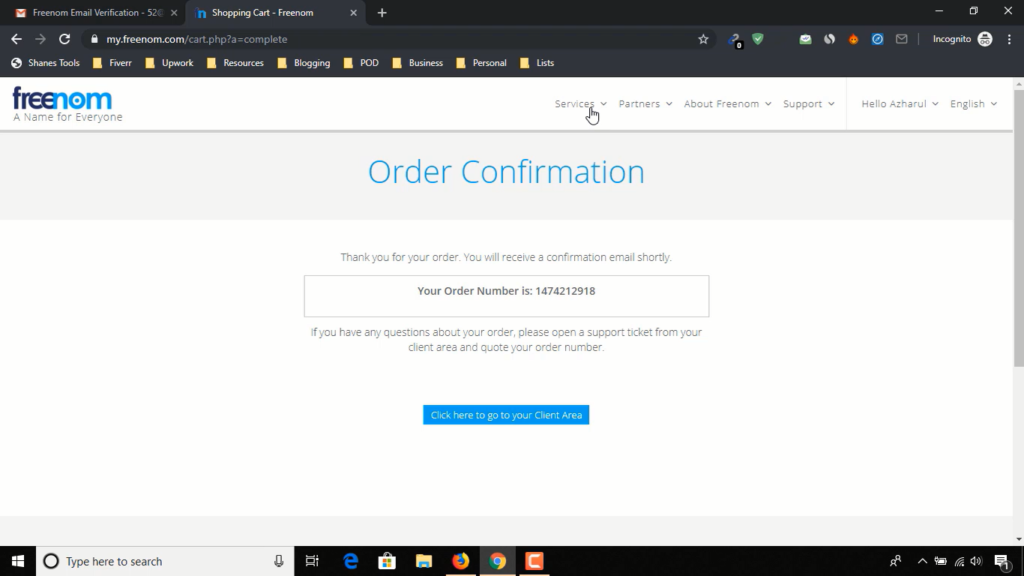
You will find an order confirmation number, just like the one shown in image below.
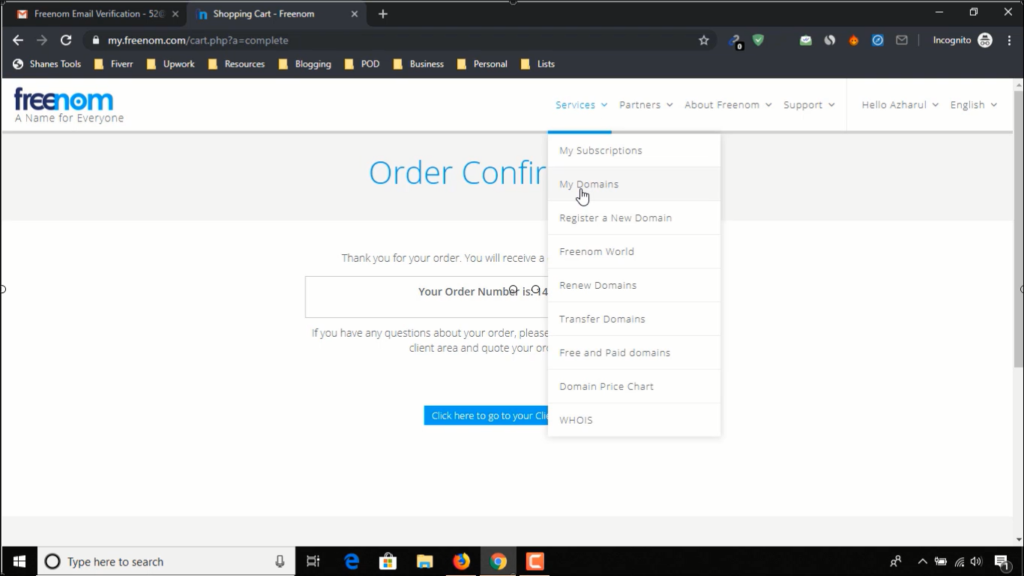
After getting the order confirmation number, you have to click on “Services”, then “My Domains” to see the domain name you’ve registered.
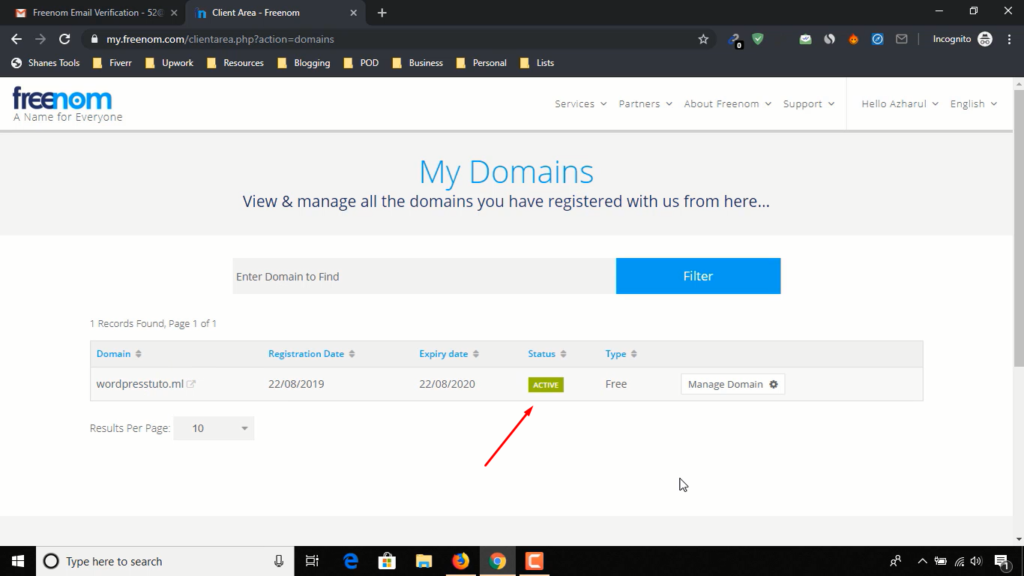
In this page, you will find your activated free domain, finally we got our free active domain name!
Registering Free Hosting Plan:
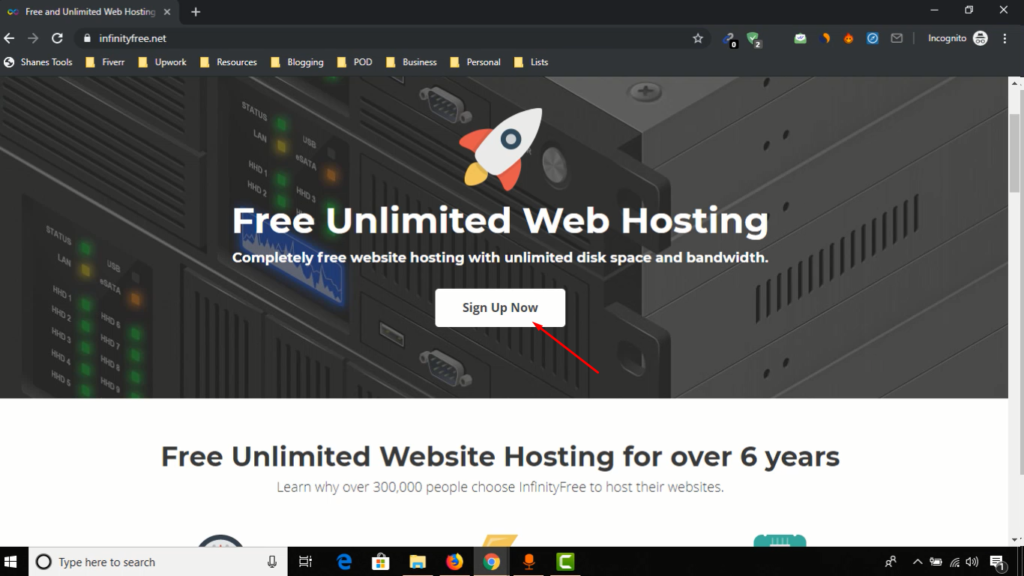
It is time to register and get our free hosting plan to park the domain and WordPress Website. To get a free hosting, we are going to use infinityfree.net, visit the website and click on “Sign Up” button.
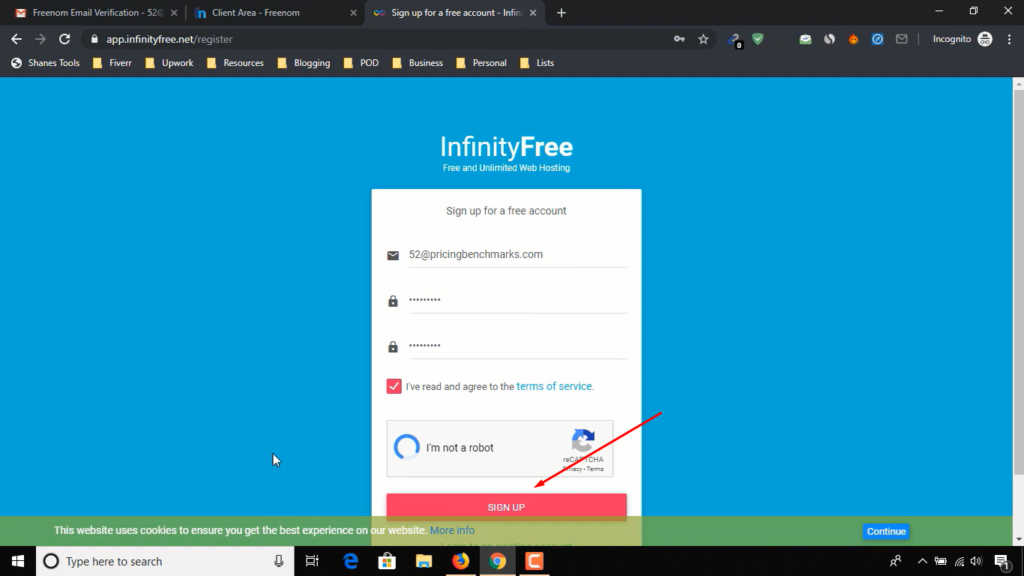
Fill up the form by entering your email and a password for this account, check mark the box of “I’ve read and agree to the terms of service”. Click on the checkbox of- “I am not a robot” and then click on “Sign Up” button to complete the InfinityFree account setup.
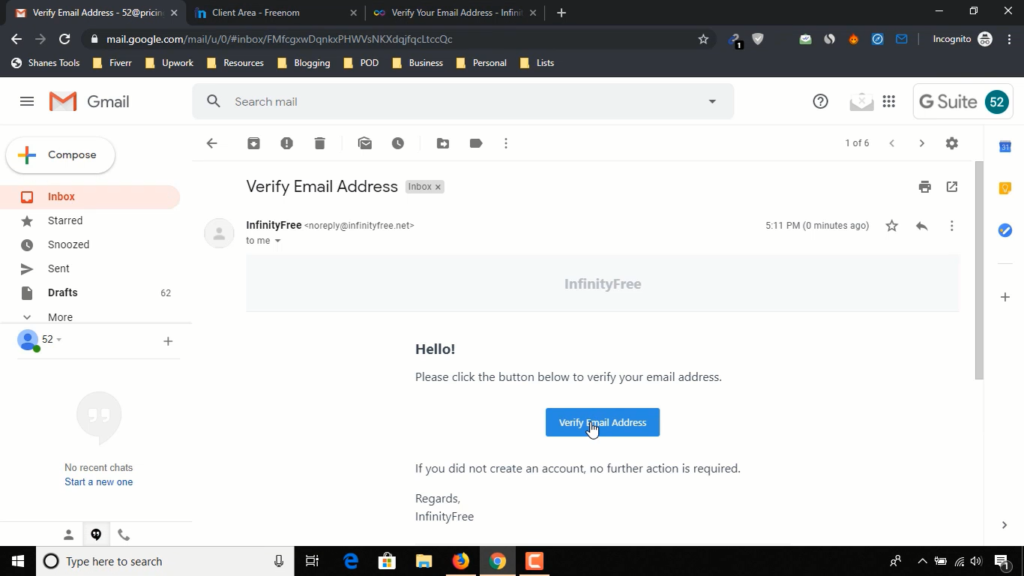
You will receive a verification email, click on “Verify Email Address” button to verify your InfinityFree account.
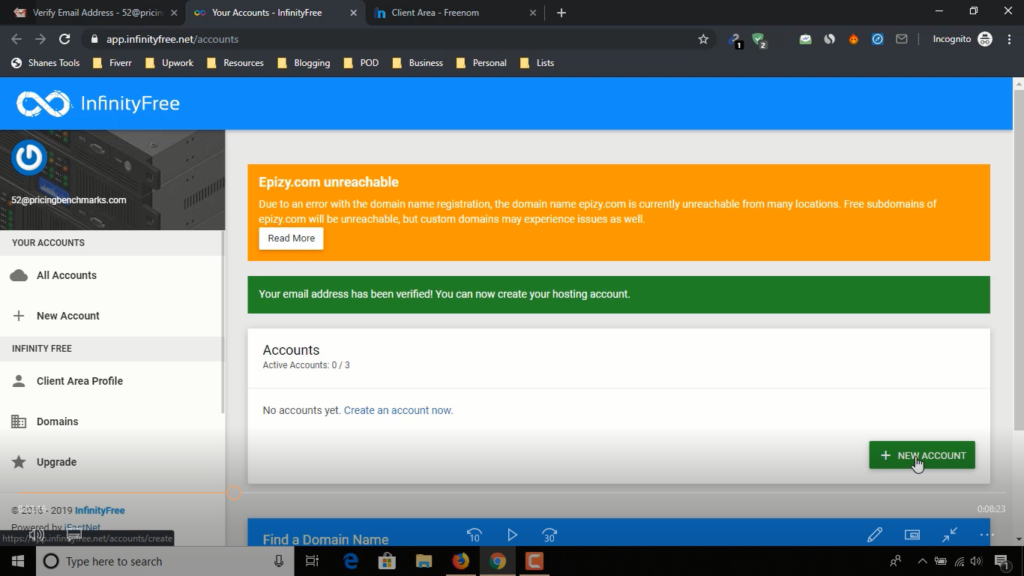
Your email address will be verified and you will get the page to create your free hosting account. Click on “New Account” button shown on the page.
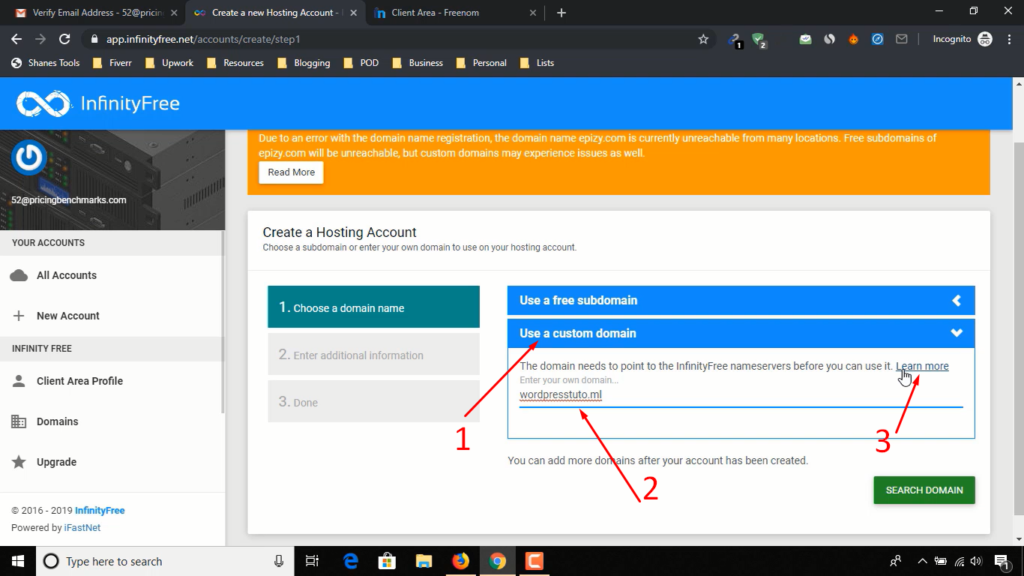
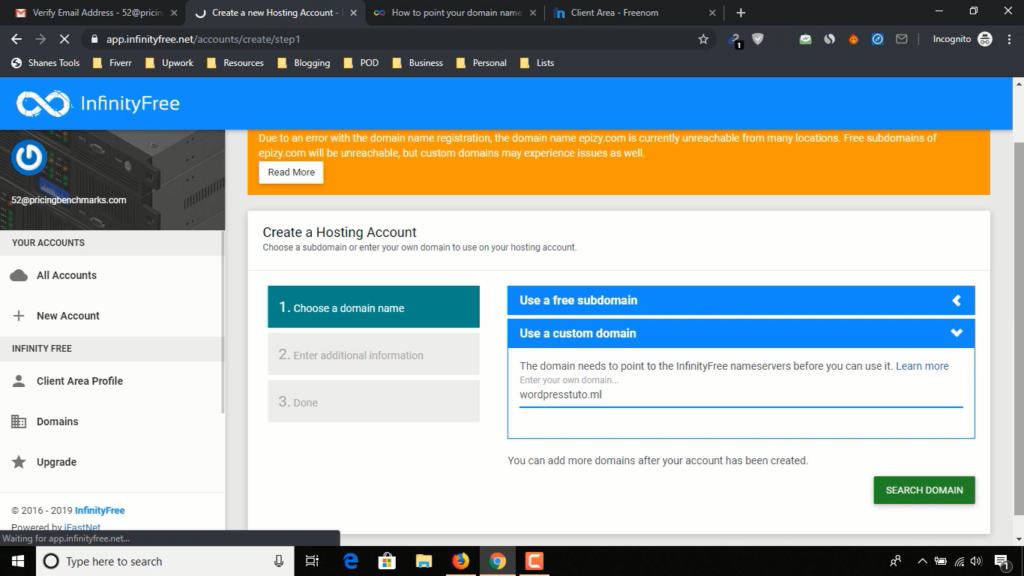
Click on “Use a custom domain” button, you will find the option to point your free domain name that you registered through Freenom website. Copy the domain name from there and paste it to the blanked field pointed on 2nd arrow sign, and we have some more to do here on this page.
Open the “Learn more” link shown on 3rd arrow sign in a new tab.
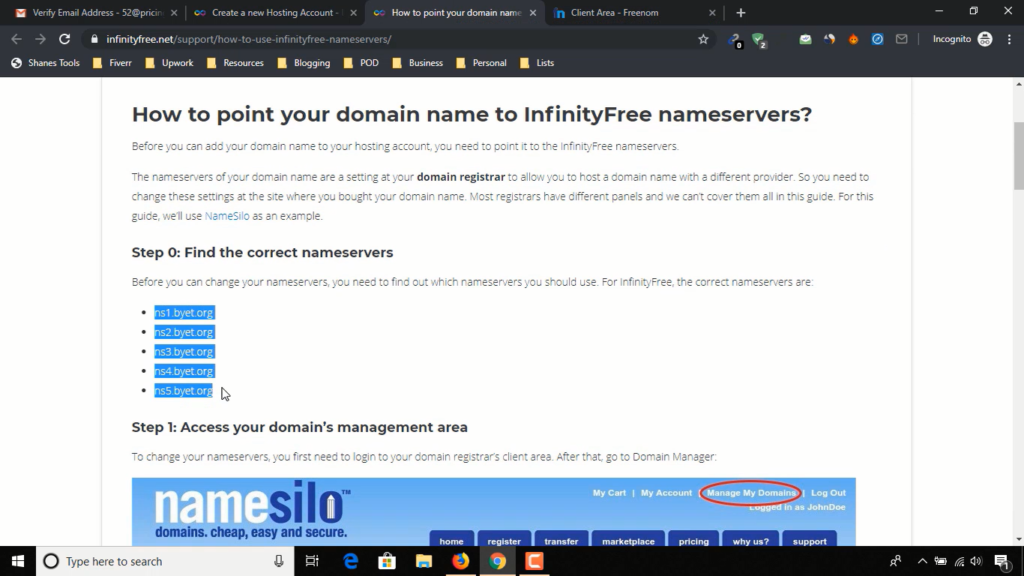
You will find the nameservers to point our domain name to this hosting plan.
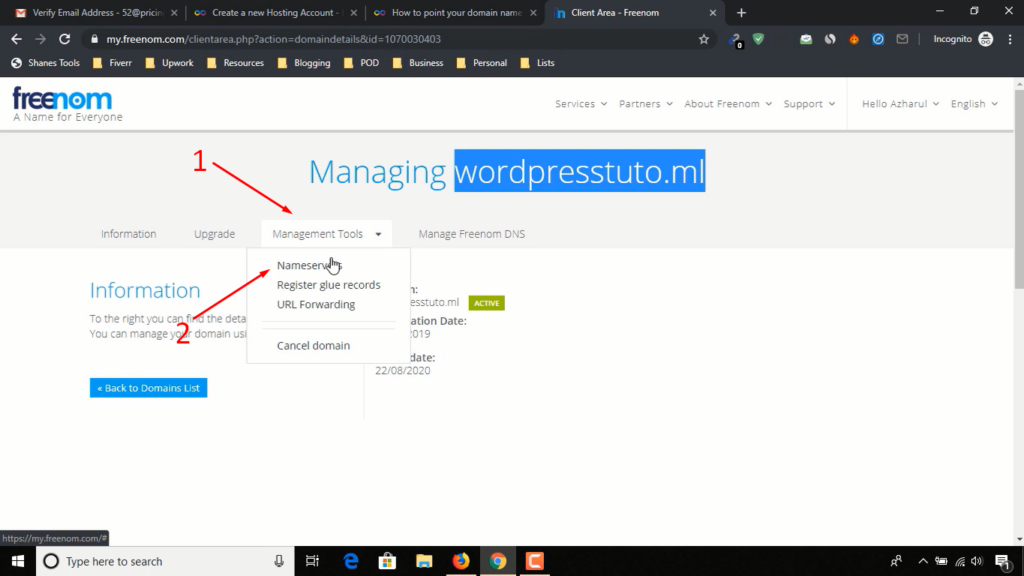
Go back to Freenom website, click on Management Tools, click on Nameservers.
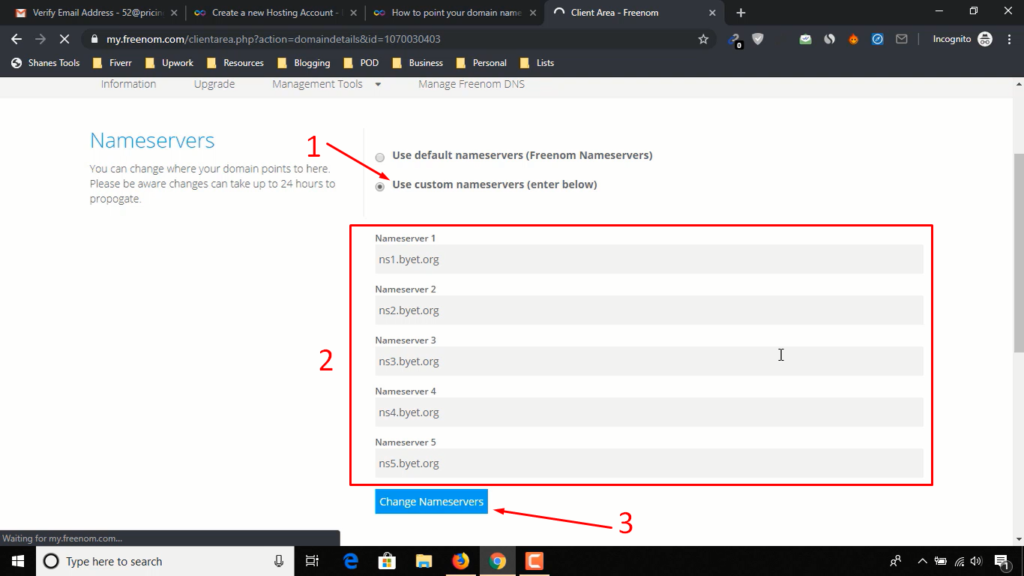
On the next page, click on “Use custom nameservers” option. Copy and paste the nameservers you have found from InfinityFree “Learn more” option. After entering them, click on “Change Nameservers” button.
If you have followed all steps accordingly, you will get a message as shown in following image.
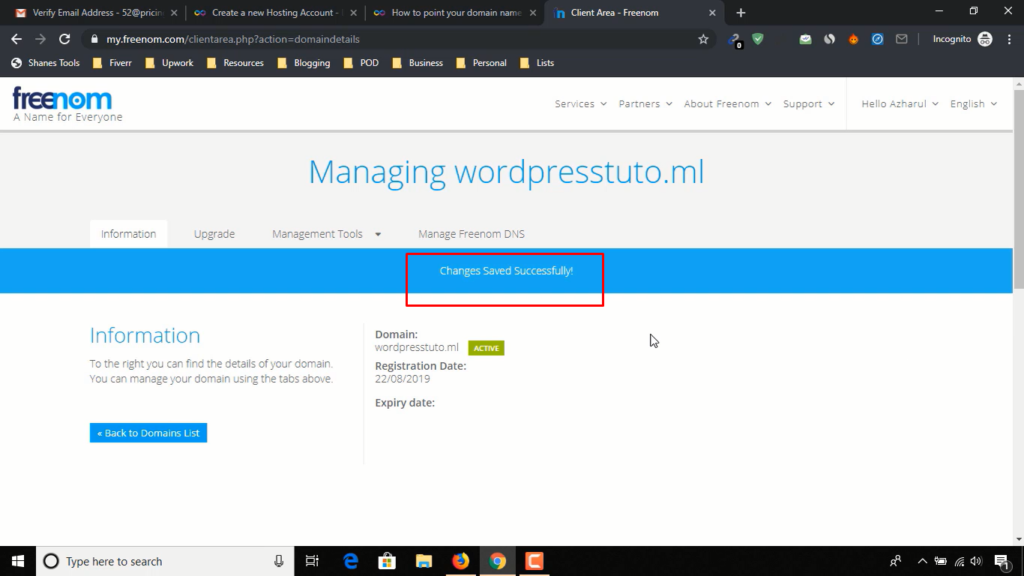
We have successfully pointed our domain name to our free hosting account. It’s time to go back to InfinityFree and click on “search domain”.
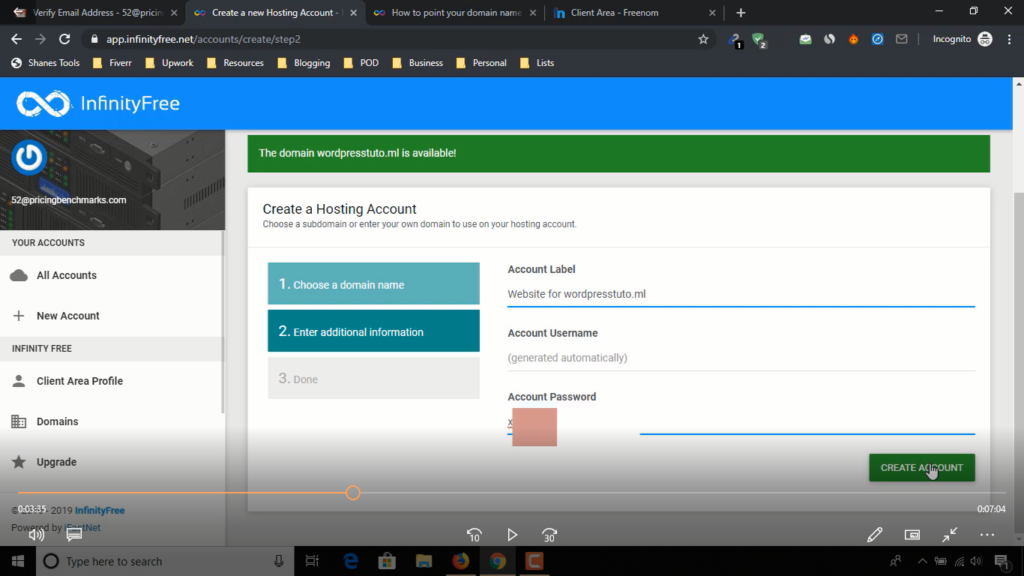
As we set up the connection, hosting account will show a message “the domain ***** is available”, and in this page, your hosting account username will be automatically generated and you will have to create your password, which will be used to access your hosting CPanel, after adding your password, click on “Create Account”
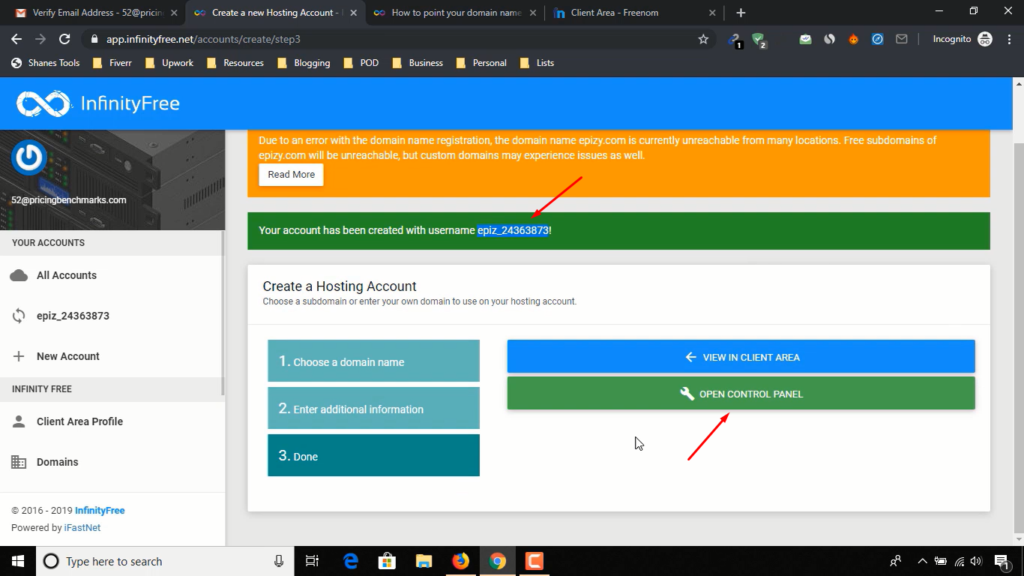
Finally, our hosting account is ready. We’ve got our username, and it’s time to access our cpanel, click on “OPEN CONTROL PANEL” button.
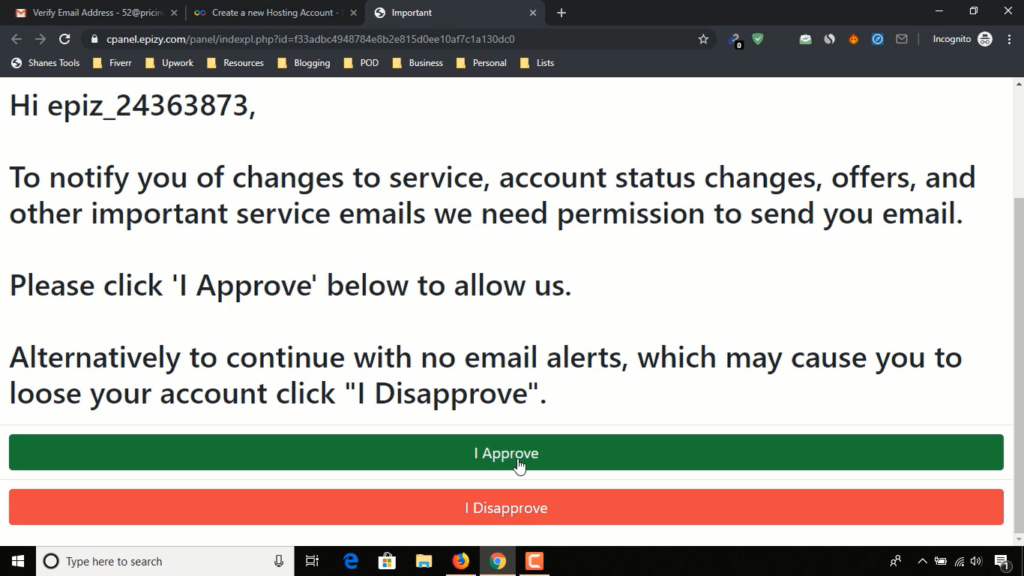
You will be redirected to a page as it is on the image below, they will ask you to provide them permission to send emails with any important update regarding your free hosting plan or account, simply click on “I Approve” button.
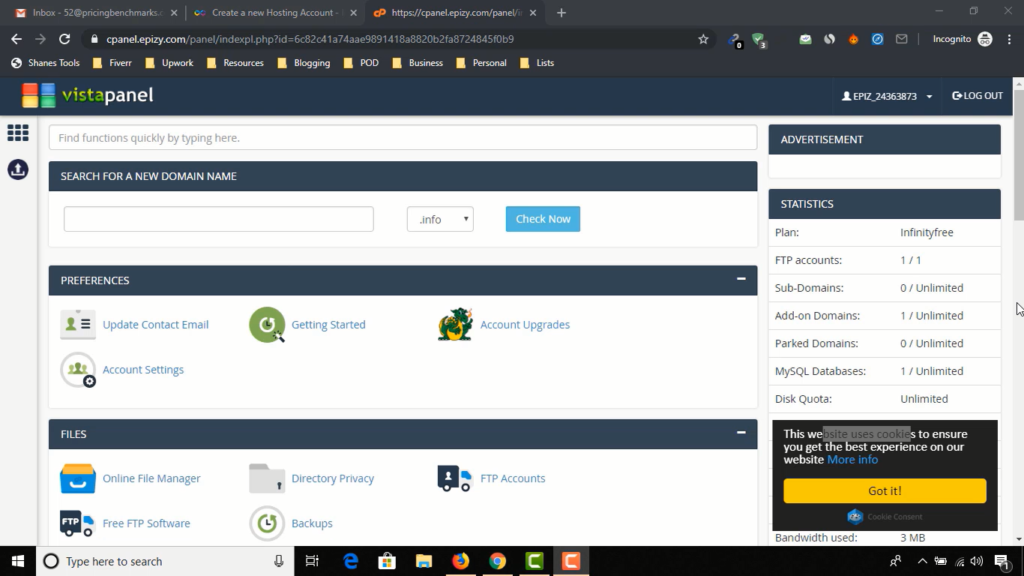
See, we’ve got access to the free cpanel of our hosting!
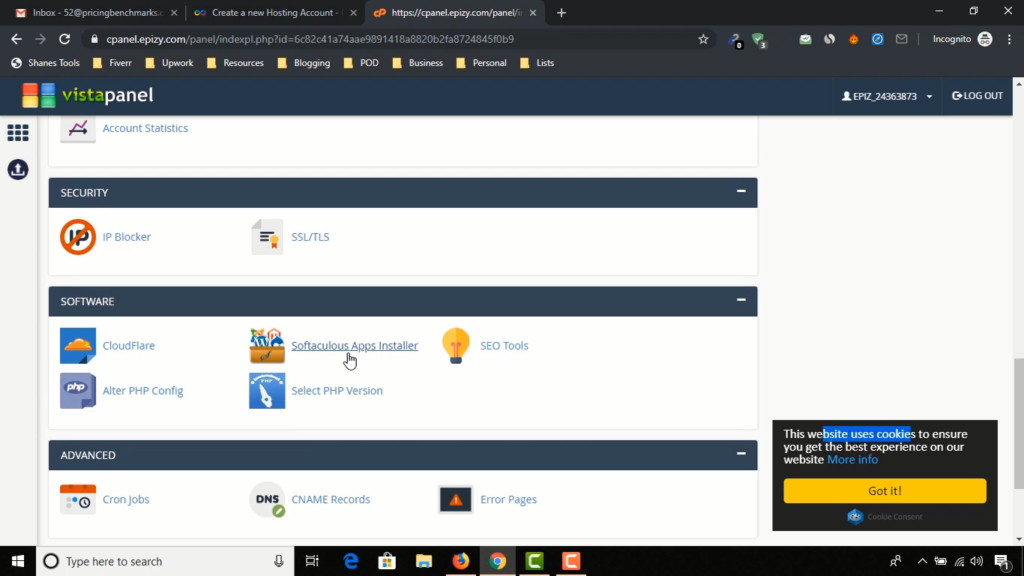
From this page, you have to find the “Softculous Apps Installer” option down below and click on it, which will lead us to install “WordPress” on our free hosting.
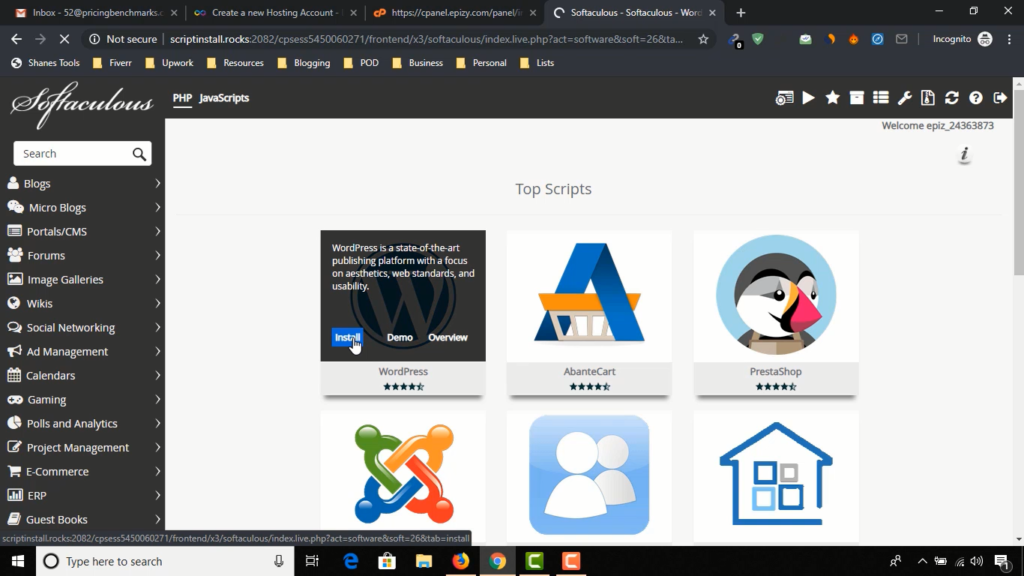
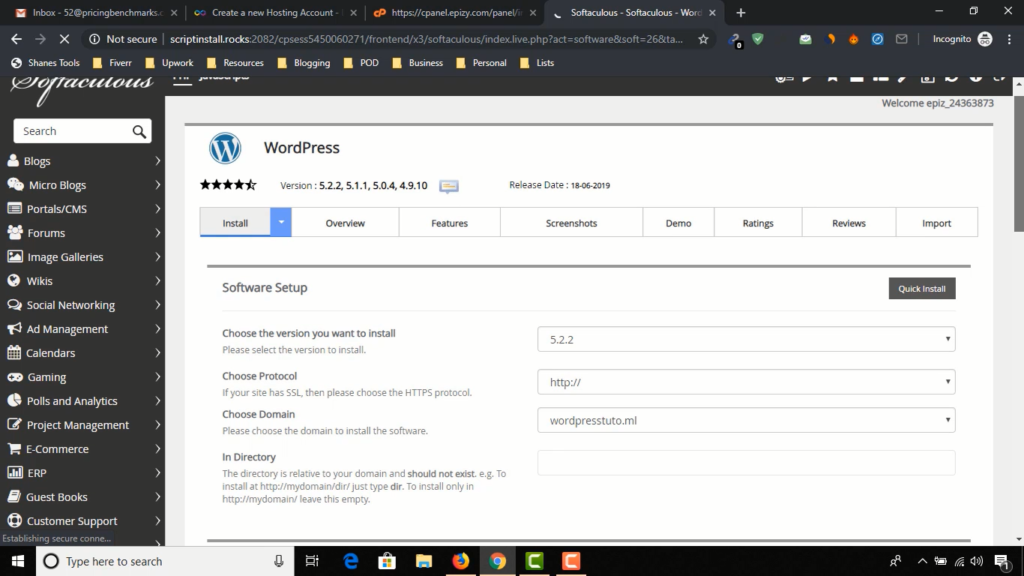
Click on “Install” to install the WordPress CMS to our free hosting plan.
It is time to assign our free domain name with WordPress.
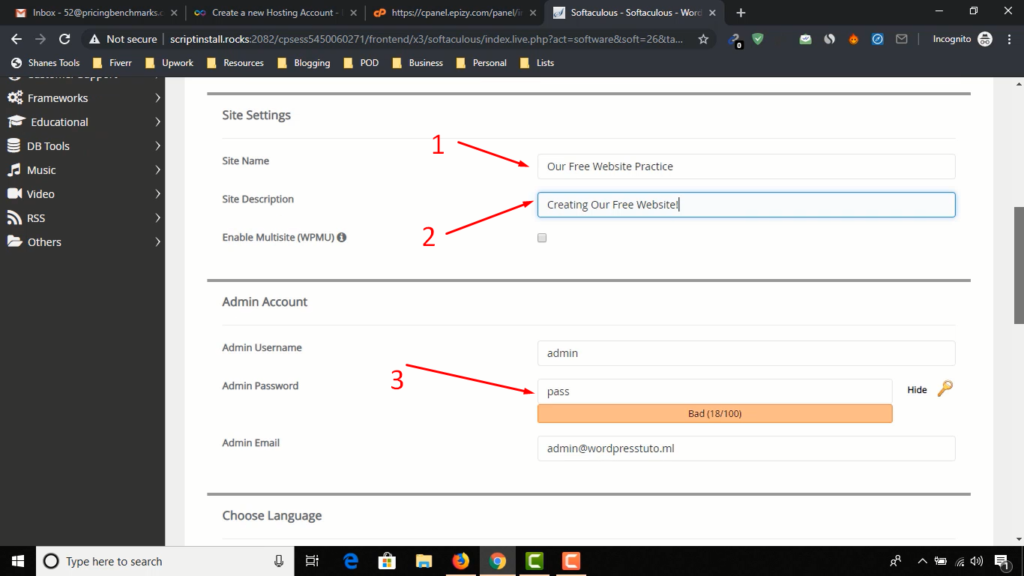
Under Site Settings, change the Site Name, Site Description and under Admin Account setups- change the password to access your WordPress Website Dashboard.
Keep all other settings as they are, and go down below.
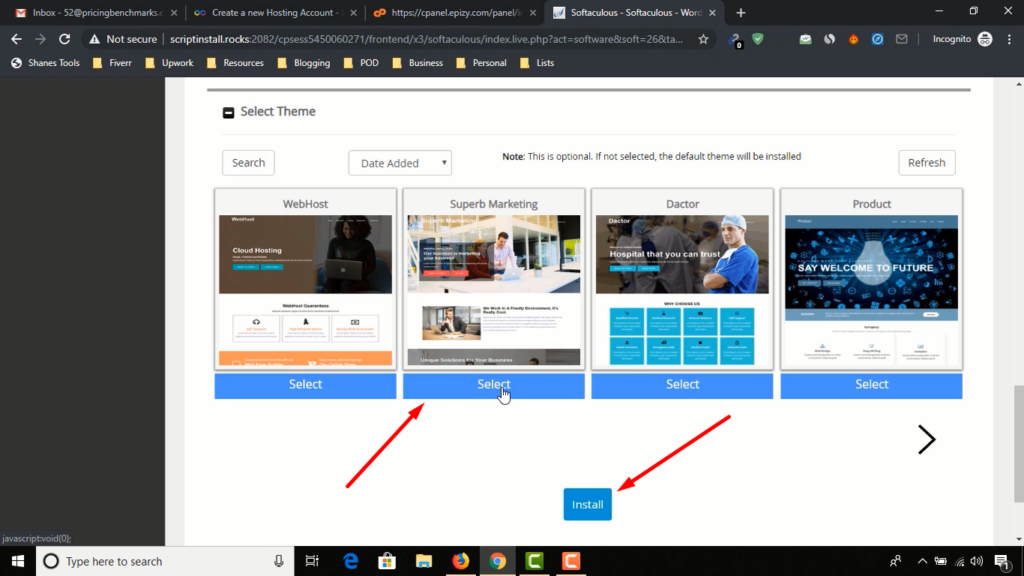
Select any of the themes for your new WordPress website and click on the “Install” button.
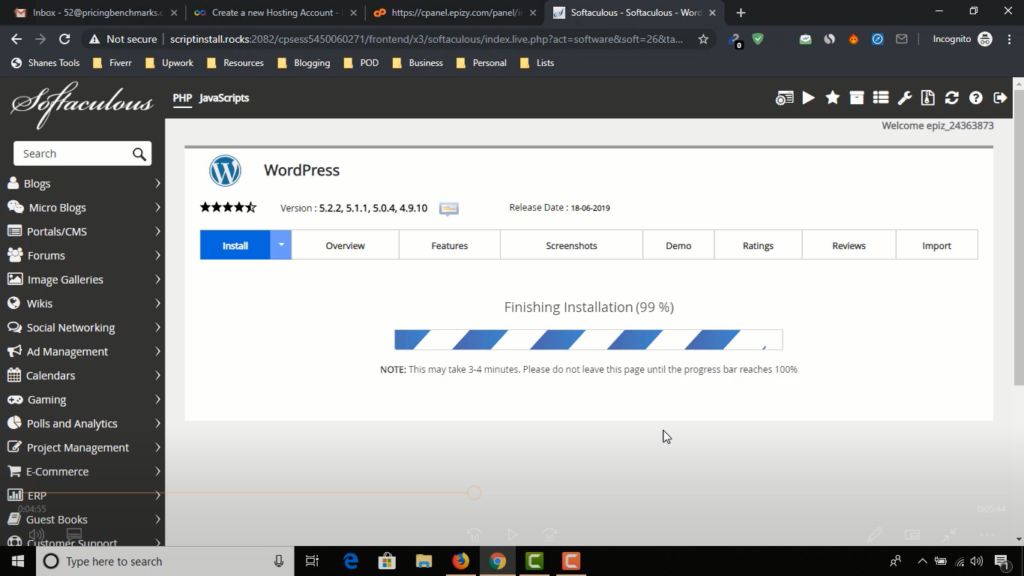
Hosting and WordPress will start installing the settings and theme that you selected. It might going to take up-to 4 minutes to finish the installation.
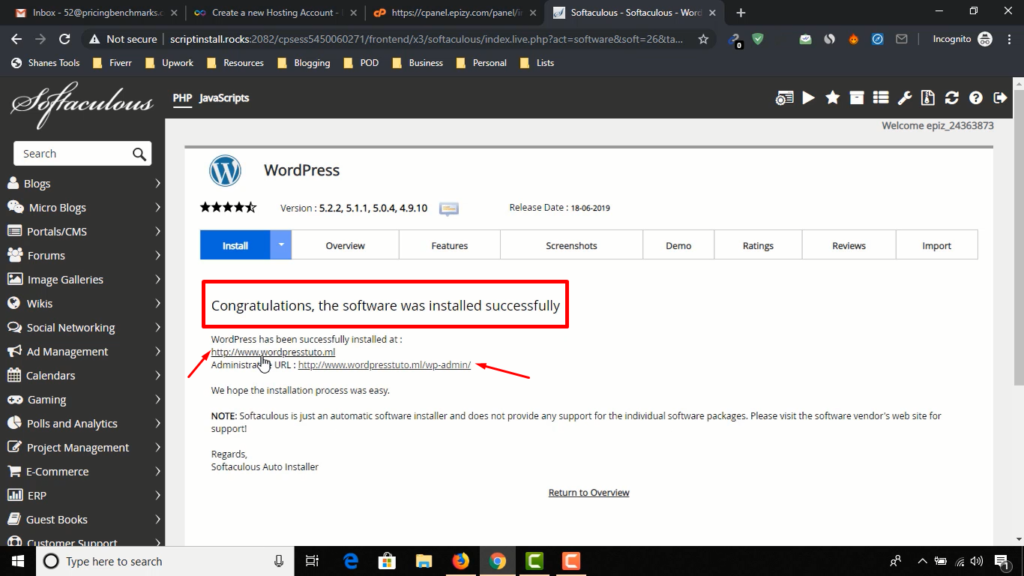
Congratulations! you have successfully set up your WordPress website to the free domain and hosting plan. Now, your website is live.
If you click on the domain name, you will see your website in live.
To customize your website, you need to click on the “Administrative URL”,
After completing all the easy processes described above, here is our website in live mode:

I have changed the theme, added some extensions and customized it to give it a cool look. Here is our website after customizations:

If you are interested to watch– how I changed the theme, added extensions and the full process of customization, please check out the following video tutorial.
I believe this complete free WordPress website setup tutorial will help you, and if you find it great, please don’t forget to let me know by commenting below, and SHARE this post to help others.
Find me on Instagram: https://www.instagram.com/azharulrafy/
Find me on Facebook: https://www.facebook.com/azharulrafy
Bests,
Azharul


